CenterPoint Accounting for Agriculture
- Aatrix 94x Series Signatures for eFiling
Related Help

To maintain compliance with the Federal Modernized eFile system, when a Federal 94x series form is selected to be eFiled, a signature process now replaces the application for a 94x ten-digit Signature PIN. The forms that use the 94x Signature process are:
- 940 Report
- 941/Schedule B/941-V Report
- 941-X Report (Not eFilable)
- 943/943-A/943-V Report
- 944 Report
- 945/945-A/945-V Report
Exporting Data from
CenterPoint Payroll
Forms Update
If you have internet access and the latest version of Federal/State Tax Forms (Aatrix) is not installed, the following Aatrix Update screen will display when you select the menu selection above.
- If you want to immediately install the update, click Yes and follow the on screen instructions. A progress bar will display as the update continues.
![]()
- If you do not want to immediately install the update and continue processing without the required update, click No.
-
- In the Report box, select 2016 94x (where x is the specific number of the report, for example 940, 941, 943, etc.) and 2016 in the Year. Click OK.
- It may take several minutes for the payroll data to be transferred to the 94x process. Actual time will depend on the number of employees in your database.
Forms Update
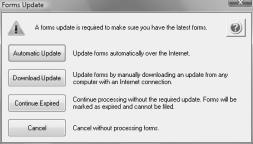
- The following Forms Update screen will display if you chose not to perform the Aatrix update when you first selected Reports > Federal & State Payroll Forms & Reports > Federal Tax Forms or State Tax Forms. If you want to continue processing your forms without performing the required update, click Continue Expired.
Forms Update
If you have internet access and the latest version of Federal/State Tax Forms (Aatrix) is not installed, the following Forms Update screen will automatically be displayed when you try to export your payroll data. Simply click on Automatic Update and follow the onscreen instructions.
![]()
Company Setup Wizard
Verify your company Federal Employee Identification Number (FEIN). If it's correct, click Next. If it's incorrect, click Cancel. You will need to go back into your
Company Information
Review your Company Information. The system will notify you if any required fields have incorrect or missing information. Click Next

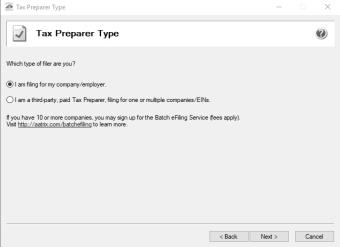
Tax Preparer Type
Specify the correct Tax Preparer Type. If you are processing the 94x forms for your company/employer or if you are a paid 3rd party tax preparer. If you are a 3rd party tax preparer, you will then be prompted for your information. After making the selection, click Next.
Processing Your Form
Various screens will display in the processing of your form, for example the State & Local Tax Items screen may display. Click Next to proceed through each displayed screen. The Setup Wizard will automatically verify that all required information are complete and conform to the required formats. If it finds a blank field or data is incorrect, it will automatically prompt you to correct the data. You will not be able to continue to the next screen of the wizard until all required fields are correct.
94x Form Display
The 94x form will be displayed after all other required screens are completed. In this example, the 2016 944 was selected. Review and edit the form, enter the required information highlighted in red, and then verify the report for accuracy. Note: The fields highlighted in blue can be changed. Print a copy for your records by clicking Print, and then print a Federal or State Copy by clicking Next Step and then clicking Print.

Select the Filing Option
- Select whether you want to eFile or Print the form.
- If you choose to print the form, select the printer and continue to file the form.
- If you choose to eFile the form, you will be required to provide an electronic signature on the Form 8453-EP screen o be compliant with the Federal Modernized eFile system.
- Click in the Click Here to Sign area. The 94x Signature Method screen displays.
- Select one of the following options:
- I want to select an existing signature assigned to a PIN - This option will be disabled if there were no signatures previously created and saved. If a signature was previously saved, it can be selected from the Select name drop-down list, which will then require the PIN for the selected signature to be entered in the PIN box.
- I want to create a new signature - Follow the steps below to create a new signature:
- Click OK.
- Provide a Name, Title, PIN, and retype the PIN to verify. The PIN is required to be 4-digits and is required when selecting to use the signature or edit the signature.
- To add the actual signature, use your mouse to click in the Click Here to Sign area. Use your mouse like a pen to "write" your signature. Click Accept. Click OK.
- I am a reporting agent - This option will indicate a reporting agent signature method and will save this setting for the user profile on the computer. If this option is selected, the Click Here to Sign area will display Reporting Agent -- Enter PIN Later.
- Click OK. The signature created or selected will display.
- Click OK to continue with the eFile process.
|
Document: 3255 |
|---|