CenterPoint® Accounting
- Transfer Funds between Bank Accounts
Related Help
 View or Print as PDF
Transferring funds between two bank accounts within the same company/fund in CenterPoint can be done two different ways depending on if a printed check is needed for the transfer.
- Transfer between Accounts (accounts are at the same bank - no check needed)
- Transfer between Accounts (accounts are at separate banks and a printed check is needed for the transfer)
Transfer Between Accounts (Same Bank - No Check Needed)
- Select Processes > General Journal Entries.
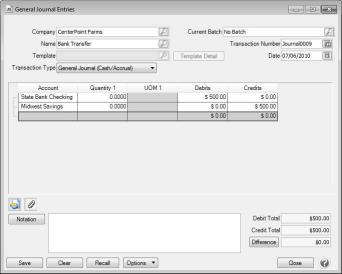
- Select the appropriate Company/Fund.
- In the Name box, select a name you wish to assign to this bank transfer. The name can also be left empty. If you choose to assign a name, then you can use the Recall button to simplify data entry on future bank transfer transactions.
Note: A generic name such as "Bank Transfer" can be created if you do frequent transfers and want to use the Recall button to enter subsequent transfers.
-
- Enter the transfer Date.
- In the grid, enter the following information into the first row:
- In the Account box, select the bank account the money will be transferred into.
- In the Debits column enter the amount being transferred.
- In the second line of the grid, enter the following information:
- In the Account box, select the bank account the money will be transferred from.
- In the Credits column, again enter the amount being transferred.
Note: If you want to attach a document to this transaction, see the Attach Documents to Transactions topic for detailed information.
- Click Save.
Transfer Between Accounts (Separate Bank - Check Needed)
- Select Processes > Purchases > Payments.
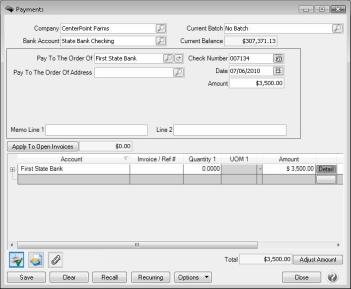
- Select the Bank Account the check will be written from.
- In the Pay To The Order Of field, select the name of the bank the money will be deposited into.
- Enter the appropriate Check Number, Date and Amount.
- In the grid, select the Account the amount will be deposited into.
- Select the Print button.
Note: If you want to attach a document to this transaction, see the Attach Documents to Transactions topic for detailed information.
- Click Save to complete the transaction and print the check.
|
Document: 3112 |
|---|