CenterPoint® Accounting
- Transferring CenterPoint Data to a New Computer
Related Help
 View or Print as PDF
This topic describes the process of transferring CenterPoint data to a new Windows® 10 computer.
Note: This document provides instructions for performing Windows updates on the most current Microsoft® operating system. For information about performing Windows updates on other operating systems, contact your IT staff, search the internet for instructions about your operating system., or see the Frequently Asked Questions section of this document.
Perform Windows Updates on the Windows 10 Operating System
Back Up the CenterPoint Data from the Old Computer
Back Up the Aatrix History File from the Old Computer (only if using CenterPoint Payroll)
Install the CenterPoint Program onto the New Computer
Restore the Database from the Old Computer onto the New Computer (only if using CenterPoint Payroll)
Perform Windows Updates on the Windows 10 Operating System
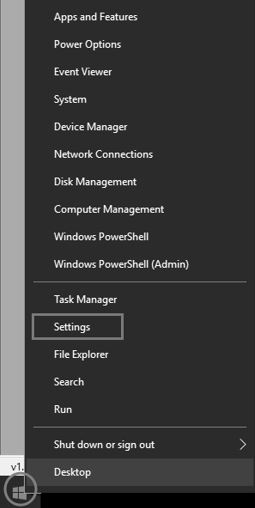
- From your desktop, right-click on the Windows Start menu and then select Settings.
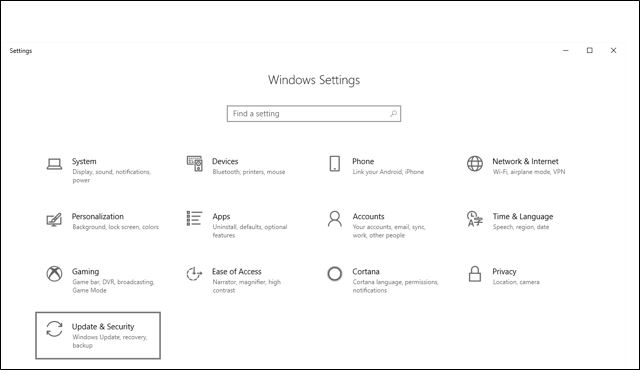
- On the Windows Settings screen, select Update & Security.
-
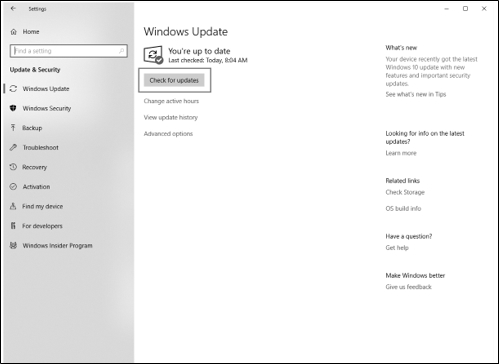
Select Check for updates (If all updates have been installed as of the time you are checking for updates, a “You’re up to date Last checked : Today 8:04am " message {this is an example message from 7/23/18}).

-
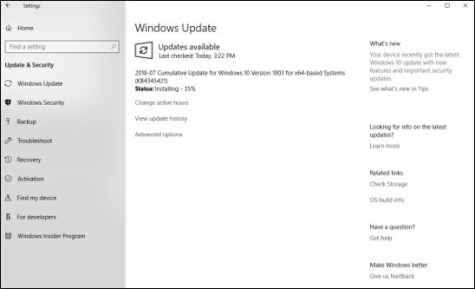
In the example above, the message indicated that the computer was up-to-date. However, after checking for updates there was an update that was required to be installed.

Back Up the CenterPoint Data from the Old Computer
- Select File > Backup > Backup Database.
- In the Database To Backup box, select the database that you want to back up. The database that is currently open will automatically display.
- In the Save To box, a default path displays. Click Browse, and then select the location on your own computer to save the backup file. Once you select the path to back up to, the last path used for backing up will automatically display each time you back up.
- To back up to your own computer, select a location on the C:\ drive. The local C:\ drive is not the recommended backup location and a message will display with a link describing the preferred backup locations: To ensure continued accessibility to your data in the event of a hard drive failure, Red Wing Software recommends that backups are saved to removable, network, or offsite storage.
- To back up to a server or remote computer, select a location on the network drive (for example, f:\ or g:\, etc.).
- To back up to a flash (thumb) drive, select the drive letter that was assigned to the drive when it was inserted into the usb port on the computer.
- If you want to back up your screen settings, report favorites, and database preferences so they are available to restore if needed, leave the Back Up User Files check box selected. This option will prevent you from redefining your specific user files, favorites, and database preferences if a restore is necessary. If you always want this check box selected, right-click on the Back Up User Files check box and select Set As Default.
- If you want to be warned when the Save To backup location you are storing backups to exceeds a specified number of files or amount of space, leave the WarnMe check box selected. When the check box is selected, and then specify the conditions about when you want to be warned:
- In the When the number of backups in this location exceed box, enter a number between 0 - 99.
- In the When the size of the backups in this location exceeds box, enter a number between 0.00- 999.99 and select either MB (megabyte) or GB (gigabyte)
- Setting either value to 0 disables that specific warning. For example, setting the When the number of backups in this location exceed box to zero will not warn you about the number of backups, but you will continue to be warned about the size of the backups according to your When the size of the backups in this location exceeds setting.
- To view the contents of the Save To backup location, click Open Backup Location.
- If you want to Close this screen when the backup completed, select this check box.
- Click Backup.
- At the Backup Completed Successfully message, click OK.Tip: Define a Preference that will automatically display the Backup screen each time you exit CenterPoint (just as if you selected File > Backup > Backup Database). To set the Backup preference:
- Select File > Preferences > General.
- Select Backup.
- Under Backup, in the Backup on Exit box, select Yes.
Back Up the Aatrix History File from the Old Computer (only if using CenterPoint Payroll)
The Aatrix History File contains historical Federal/State Tax Forms. It is necessary to back up this file regularly so that if you purchase a new computer, the history can easily be transferred to the new computer by restoring the backup.
- Select File > Backup > Backup Aatrix History Files.
- Select the employers to back up history files for.
- Click OK.
- Select a location to save the AatrixHistoryBackup.zip file to and then click Save.
- At the Back Up Created message, click OK.
Install the CenterPoint Program onto the New Computer
- Close all other programs prior to starting the installation of CenterPoint.
- From a web browser, enter www.redwingsoftware.com.
- From the Red Wing Software home page, in the upper-right corner, click Log in, enter your Email Address and Password, and then click Log In.
- If you have not previously registered on the Red Wing Software website, please see the Frequently Asked Questions section of this document for more information about registering on our website.
- If you do not recall your password for the Red Wing Software website, please see the Frequently Asked Questions section of this document for more information on retrieving a forgotten password.
- To download the CenterPoint program:
- Click the My Account button to display the My Account page. Select the Downloads tab, locate your product, select Downloads, locate the download you need, and then click Download Now.
Or
- Select Support & Learn, select Downloads, locate the download you need, and then click Download Now.
- Wait while the program downloads. The file will automatically save to your Downloads folder. If you are unable to download CenterPoint, please contact our Technical Support Department.
- Select the CenterPoint##.exe file in your task bar or open the Downloads folder and then select the file to begin the installation. Wait while the contents of the setup package are verified.
- If you receive a User Account Control screen, with a Do you want to allow this app to make changes to your PC? message, click Yes to continue.
- If you receive an Application Requirements screen, click Next to install the necessary requirements. Wait while the requirements are installed.
- If you are prompted to restart your computer, click OK. The computer will restart and the installation will automatically resume (Microsoft® Windows Vista™ and Windows® 7 users, see the note below). This process may repeat depending on the number of requirements you need to install.
- On the Welcome screen, click Next to continue.
- On the License Agreement screen, select the I accept the terms of the license agreement check box, and then click Next to continue.
- On the Setup Type screen, select Complete, and then click Next to continue.
- By default, CenterPoint will install to C:\Program Files\Red Wing Software\CenterPoint. We recommend accepting the default. On the Destination Folder screen, click Next.
- On the Select Program Folder screen, you should generally accept the default program folder location by clicking Next.
- On the Completing screen, click Next to continue. Please wait while CenterPoint is installed.
- On the Completing screen, click Finish. If you are prompted to restart your computer, please do so at your earliest convenience.
- If you also purchased CenterPoint Payroll, follow steps 1-16 to install CenterPoint Payroll.
- Individual modules are configured separately after purchase and registration. See the How to Add a Module topic after CenterPoint is started if you have purchased the Accounts Receivable or Inventory modules. Select Help > CenterPoint Help > Installation and Registration > Add a Module to an Existing Database.
- To start CenterPoint, double-click the CenterPoint icon on your desktop.
- On the Module Configuration Manager screen, review the selections and click OK.
Restore the Database from the Old Computer onto the New Computer
- On the File menu, select Restore Database.
- In the Backup File To Restore box, select the backup file in the shared folder. Click Browse to locate the file you want to restore. The file name for the backup file is "databasename.cpz".
- The database name should automatically display in the Database to Restore box. This can be changed if you'd like to rename the database.
- The Restore Databases Path will also automatically display. This is the location on the server where the data will go.
- In the Server field, select the SQL server you would like the database restored to.
- If you selected to restore a database that had the Back Up User Files option selected when the back up was performed, all of the user files will display. Please review the items that are included in the back up.
It is important to note that if you are restoring from a source other than your original database, (for example your Accountant or Service Bureau backed up data and are now having you restore the data) that the selected items will be overwritten with their settings for reports, preferences, and screen settings unless you unselect the items you do not want to restore.
- Click Restore. At the You are trying to restore database "Databasename." If the database exists, all the current data will be overwritten with the restore database's data and cannot be retrieved. Do you want to continue? message, click Yes to continue restoring the database, or click No to cancel the restore procedure.
- At the Restore Completed Successfully message, click OK. The Restore Database screen will close automatically.
Restore the Aatrix History File from the Old Computer (only if using CenterPoint Payroll)
- Select File > Restore > .Restore Aatrix History Files.
- Select the Aatrix History file you want to restore. Click Open.
- Select the employer(s) you want to restore history for.
- Click OK.
- At the This will overwrite the existing history data, are you sure? message, click Yes to replace the existing Aatrix History files or No to cancel the restore.
- Click OK.
Frequently Asked Questions
Q: The computer I am transferring data to does not have the Windows 10 operating system. How do I install Windows updates on a Windows 8 computer?
A: Follow the steps below for Windows 8:
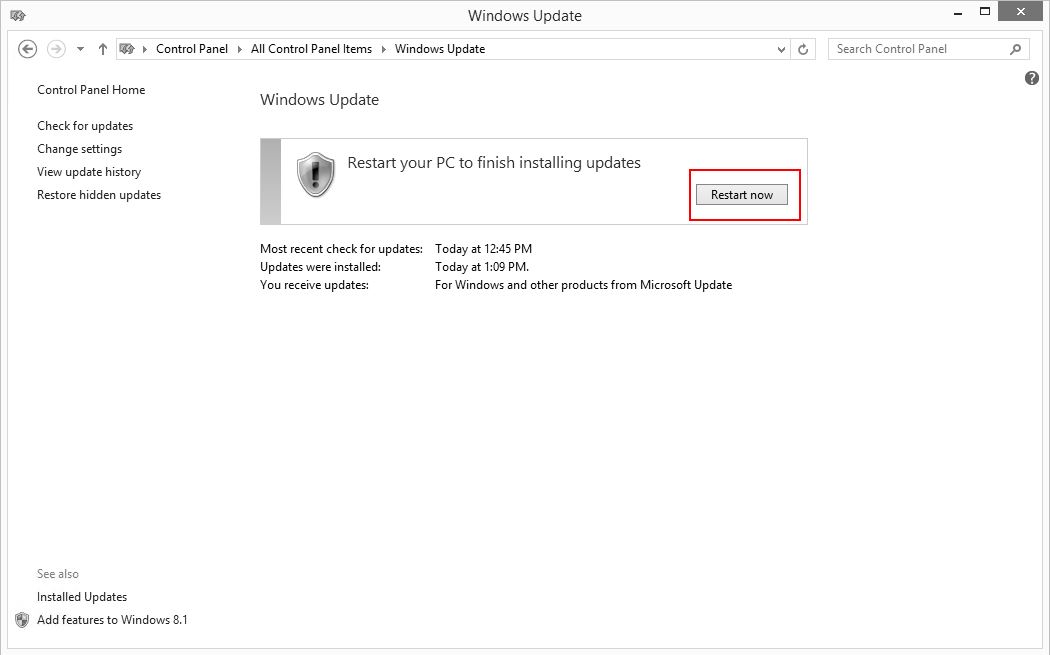
Perform Windows Updates on the Windows 8 Operating System
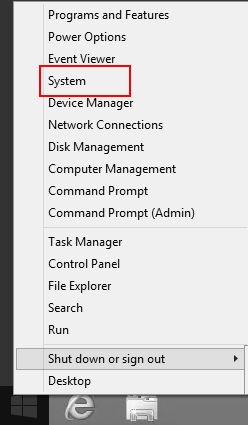
- From your desktop, right-click on the Windows Start menu icon
 and then select System.
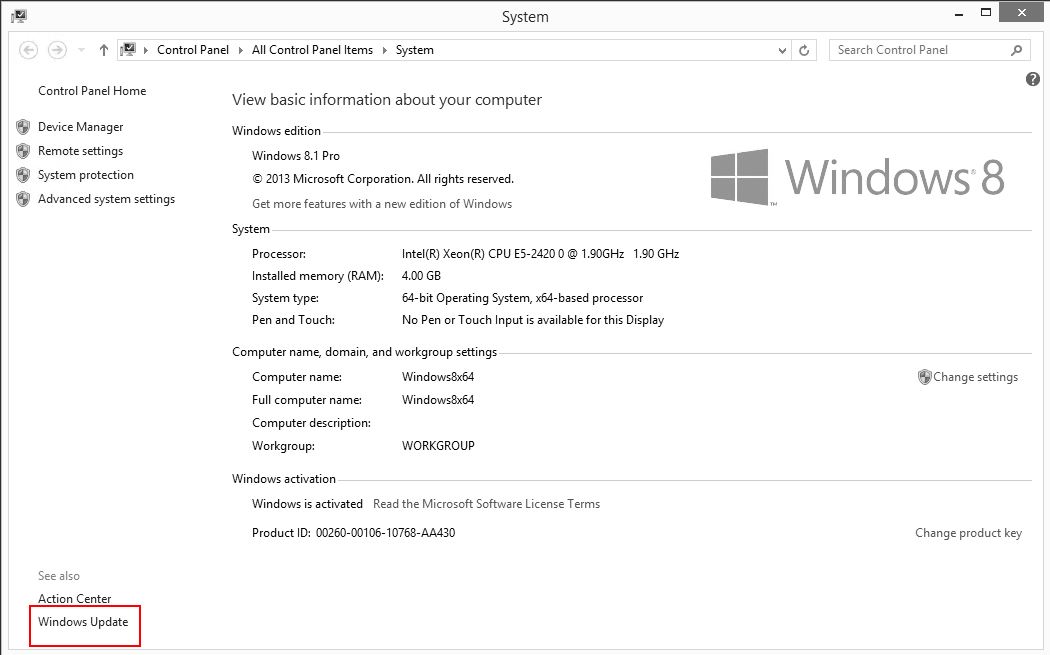
- Select Windows Update.
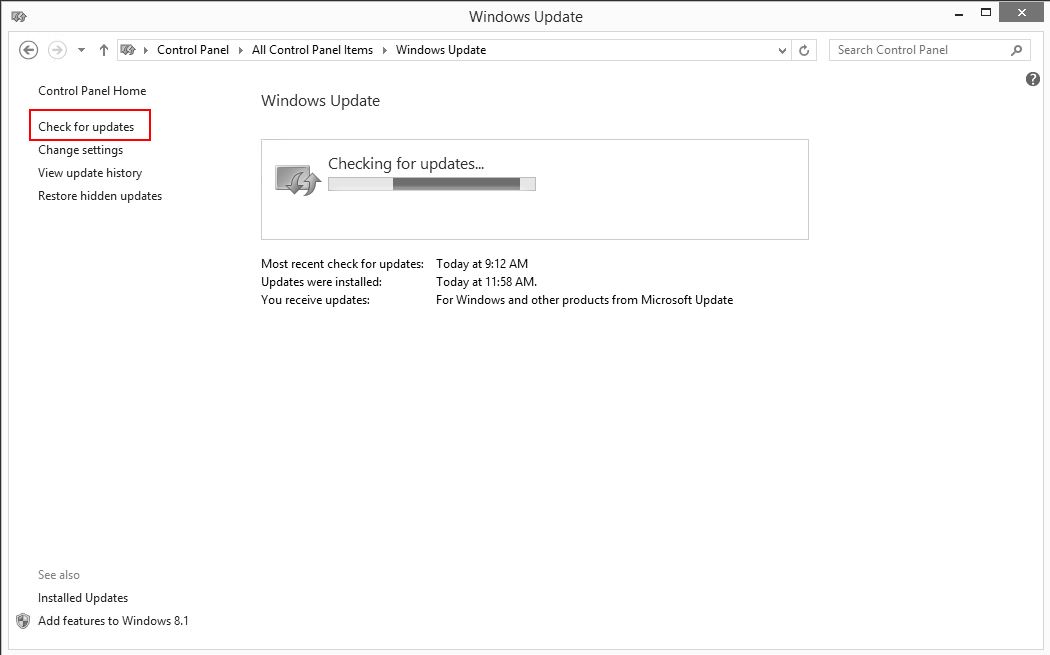
- Select Check for Updates.
- Click Install Updates.
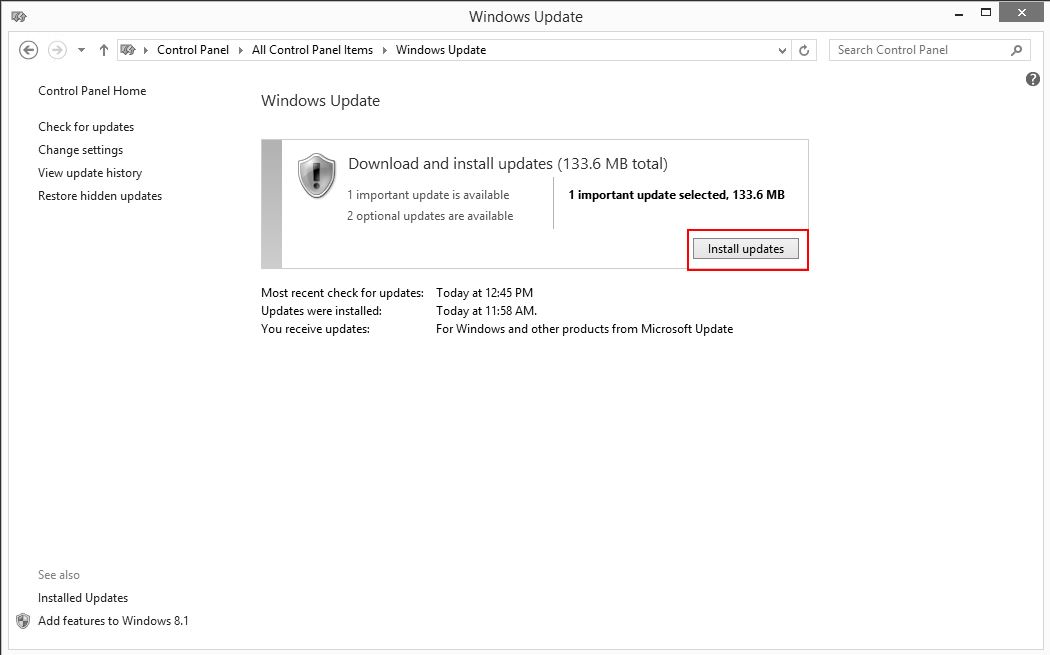
- When the Updates are successfully installed, click Restart now.
Q. I'm attempting to log in to the Red Wing Software website, but it does not recognize my Email and/or Password? What should I do?
A. Follow the instructions below for information about the Red Wing Software website.
To register on the Red Wing Software website:
The Red Wing Software website uses the same login as Red Wing Software's Web Services (Pay Advices, CenterPoint Time Clock, or Employee Portal). If you have an existing account for Web Services, enter the same user credentials to log in to the website. If you do not have an existing account for Web Services, follow the steps below:
- From a web browser, enter www.redwingsoftware.com.
- In the upper-right of the Red Wing Software home page, click Log in.
- Click Create One!
- Enter your First Name and Last Name.
- Enter an Email address and a Confirm Email address which must match the contents of the Email field for the registration to be processed.
- Enter a Password and Confirm Password. Passwords must be at least six characters and no longer than 25 characters, include one numerical character and one lower-case letter.
- Click Create.
- In the Account Number box, enter your company Account Number. Your Account Number can be located in a few different places:
- From within CenterPoint by selecting Help > About.
- On the Support Certificate that you receive upon renewing Customer Care Membership.
- Red Wing Software sends customers a renewal form for Customer Care Membership. This renewal form contains your account number.
- Invoices you’ve received from Red Wing Software contain your account number.
- If others at your company have already registered, they can sign into their account and find your company’s account number at www.redwingsoftware.com/home/myaccount.
- Continue entering your Title, First and Last Name, Email Address (which is your login) and a Password.
- Enter the displayed Security Verification code, and then click Submit.
To log in to the Red Wing Software website:
- In your web browser, enter www.redwingsoftware.com, and press Enter.
- In the upper-right of the Red Wing Software home page, click Log in.
- Enter your Email Address and your Password.
- Click Log In.
To reset a forgotten password:
- In your web browser, enter www.redwingsoftware.com, and press Enter.
- In the upper-right of the Red Wing Software home page, click Log in.
- Click the Forgot your password? link.
- Enter your Email address.
- Click Email Link.
- An email will be sent to your current email address from Red Wing Software. Open the Reset Password email and click the here link.
- Enter your Email address, your new Password, and then enter your new password again in the Confirm password box, and then click Reset.
- Continue with the To log in to the Red Wing Software website section above.
To log out of the Red Wing Software website:
- On the upper-right side of the Red Wing Software home page, click the drop-down arrow next to the My Account button.
- In the displayed menu, select Log out.
|
Document: 3342 |
|---|