CenterPoint® Accounting for Agriculture
- Enter a Credit Received from a Vendor
Related Help
_24.jpg) Enter a Refund from a Vendor Video - Duration: 2 min 30 sec
Enter a Refund from a Vendor Video - Duration: 2 min 30 sec
Enter a Credit from a Vendor Video - Duration: 3 min 09 sec

| Document #: | 3315 | Product: | CenterPoint® Accounting |
|---|
This topic will explain how to enter a credit received from a vendor that corrects a previous invoice.
Enter a Credit Received from a Vendor
Apply a Credit Received from a Vendor to an Invoice
or
Enter a Credit Received from a Vendor
- Select Processes > Purchases > Vendor Invoices (A/P).
- In the Company/Fund box, select the company/fund name that the credit is being entered for.
- In the Vendor box, select the vendor that you are receiving the credit from.
- Verify/change the AP Account.
- Verify/change the Date Due (the date should be changed to a more current date if you want it to display on the Pay Invoices Due screen so it can be applied to an outstanding invoice if need be).
- Select the Account that should be credited by the amount of the credit.
- In the Amount box, enter the amount as a negative.
- If you need to adjust the quantity the credit applies to, enter the quantity as a negative.
- In the Notation box, optionally enter why the credit is being entered.
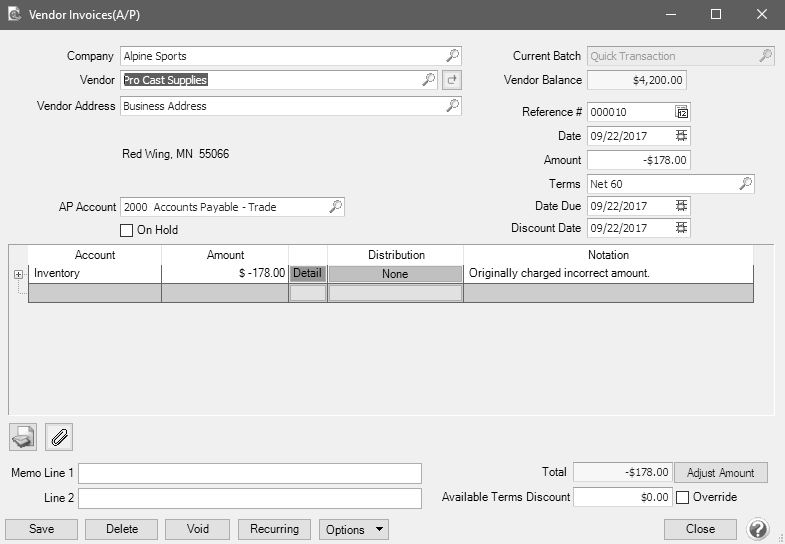
- Click Save.
Apply a Credit Received from a Vendor to an Invoice
- Select Processes > Purchases > Pay Invoices Due.
- Select the Company/Fund.
- Click the Expand Invoices button.
- Select the Pay check box for the invoice(s) and the credit to be applied.
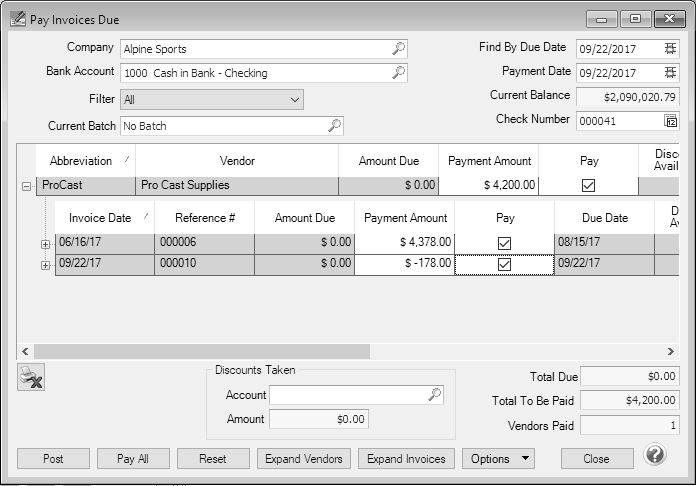
- Click Post.
or
Apply a Credit Received from a Vendor on the Payment Screen
- Select Processes > Purchases > Payments.
- Select the Company/Fund and Bank Account.
- Select the Vendor the credit was entered for.
- Leave the Amount at 0.00.
- Click the yellow Apply to Open Invoices button.
- Select the invoice and the credit that should be applied to the invoice. Click OK.
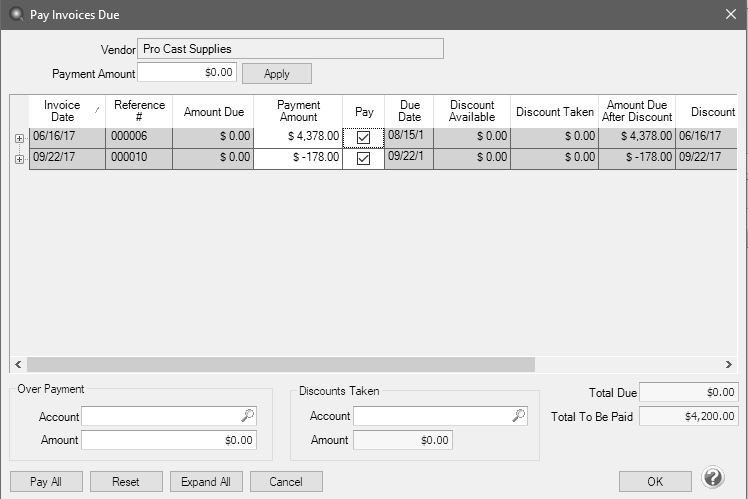
- On the Payment Entry screen, click Save.
- At the displayed message, click Yes.
|
Document: 3315 |
|---|