CenterPoint® Fund Accounting
- Locking Periods or Years in CenterPoint
Related Help
_24.jpg) Lock Periods Video - Duration: 3 min 15 sec
Lock Periods Video - Duration: 3 min 15 sec
The Lock Period function in CenterPoint restricts users from modifying, deleting or adding transactions in a particular period or year. For example, after financial reports (or tax reports) are printed for a period or year, that time period can be locked so the transactions that created the balances on those reports can not be changed.
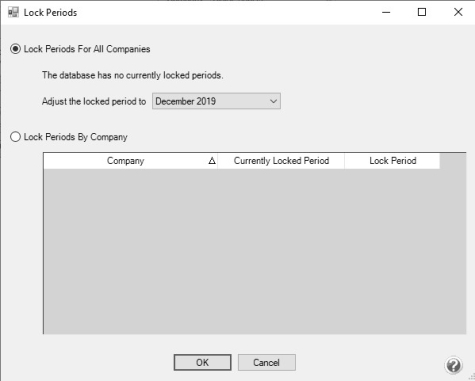
- Select File > Administration > Lock Periods. The first time you select this menu option for a database, your screen will display with a "The database has no currently locked periods" message:
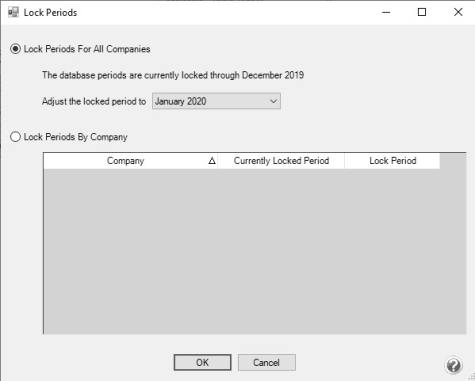
Each time you select this menu option for a database after the first time, your screen will display with the period currently locked through period:
- Select whether you want to Lock Periods for All Companies or Lock Periods By Company.
- If you selected to Lock Periods for All Companies:
- The Adjust the locked period to box displays the period containing the current system date if it is not locked, otherwise it will display as the first unlocked period following the current system date. If all periods are locked, the period will be set to the last period or if there is no period containing the current system date, the period is set to the most recent period in the database. Select the Period that you'd like to close.
- Click OK.
- All transactions in that period and before will be locked. Transactions cannot be edited, deleted or added to a locked period.
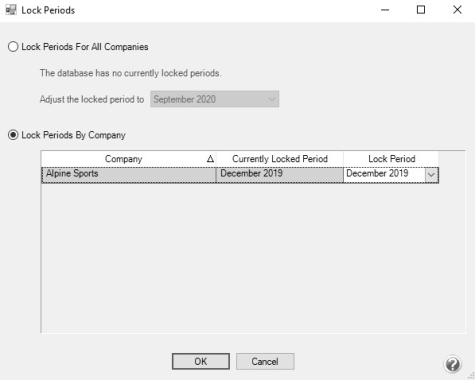
- If you selected Lock Periods by Company:
- Select the company you want to lock periods for.
- The Lock Period box, displays the period containing the current system date if it is not locked, otherwise it will display as the first unlocked period following the current system date. If all periods are locked, the period will be set to the last period or if there is no period containing the current system date, the period is set to the most recent period in the database. Select the Lock Period that you'd like to close.
- Click OK.
- All transactions in that period and before will be locked. Transactions cannot be edited, deleted or added to a locked period.
To Unlock a Period
If transactions in a locked period need to be modified, the period must first be unlocked.
- To unlock a period for all companies:
- Select File > Administration > Lock Periods.
- Select Lock Period for All Companies.
- The Period box displays the period containing the current system date if it is not locked, otherwise it will display as the first unlocked period following the current system date. If all periods are locked, the period will be set to the last period or if there is no period containing the current system date, the period is set to the most recent period in the database. Select the Period PRIOR to the period that you need unlocked. For example if your periods are locked through December 2020, but you need to modify an entry in June, select May, 2020 in the Lock Periods screen. All periods after the period selected will then be unlocked.
- Click OK.
- After the transactions are modified for that period, change the locked period back to the previously selected period.
- To unlock a period for a specific company:
- Select File > Administration > Lock Periods.
- Select Lock Periods by Company.
- Select the company you want to unlock a Period for.
- The Lock Period box, displays the period containing the current system date if it is not locked, otherwise it will display as the first unlocked period following the current system date. If all periods are locked, the period will be set to the last period or if there is no period containing the current system date, the period is set to the most recent period in the database. Select the Lock Period PRIOR to the period that you need unlocked. For example if your periods are locked through December 2020 but you need to modify an entry in June, select May, 2020 in the Lock Periods screen. All periods after the period selected will then be unlocked.
- Click OK.
- All transactions in that period and before will be locked. Transactions cannot be edited, deleted or added to a locked period.
|
Document: 3057 |
|---|


