CenterPoint® Fund Accounting
- Red Wing® Cloud Services - CenterPoint (Back Up or Restore Data)
Related Help

This document explains how to back up or restore data using the Red Wing Cloud Services.
How do I Back Up and Restore Data?
Understanding Red Wing Cloud Services Backup and Restore
Back Up your Database using the Red Wing Cloud Services
How do I Back Up and Restore Data?
Understanding Red Wing Cloud Services/CenterPoint Backup and Restore
Cloud Service Backup and Restore:
- To ensure the safety of your data, backups are performed by the Red Wing Cloud Services every evening. These backups are stored off-site at the Red Wing Cloud Services data center. The time period of the daily data maintenance occurs somewhere between 11 PM and 1 AM.
- Your data is backed up automatically with three weeks of history available.
- There is no additional charge to have Red Wing Software restore your data from within the last 24 hours (the prior night backup) from the Red Wing Cloud Services. The cost to have Red Wing Software restore your data after 24 hours from the Red Wing Cloud Services backup is $175.
CenterPoint Backup and Restore Utilities:
- We highly recommend you do consistent backups using the built-in backup process in your CenterPoint program by selecting File > Backup > Backup Database and store those backups to a location easily accessible. In the event you need to restore your database, this eliminates the cost and longer time-frame related to retrieving the data from the data center.
When you use the Red Wing Cloud Services, CenterPoint runs on a server in a remote data center and you cannot save a backup directly to a local or network drive on your computer. The Red Wing Cloud Services uses the L: drive for backups, when you do a backup from within CenterPoint a default Save To location will display and will be automatically saved on your L: drive. If you need to save the backup to your local computer, it can be copied from the L: drive to your local computer.
Back Up your Database using the Red Wing Cloud Services
- Connect to the Red Wing Cloud Services.
- Select your CenterPoint application from the list of applications.
- Click Connect.
- Open your CenterPoint database.
- Select File > Backup > Backup Database.
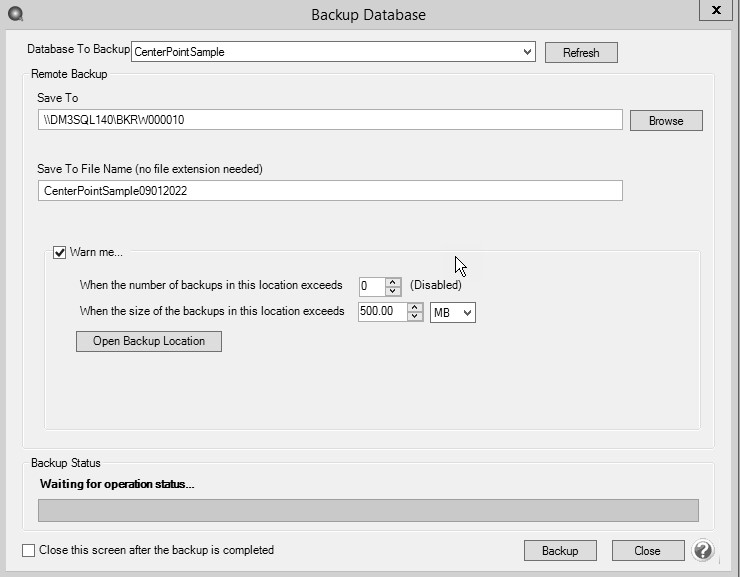
- The Save To will default to a location that cannot be changed (this location is on the L: drive).
- The Save To File Name will also default, but you can change the name of the file.
- Select the Warn Me check box if you would like to be notified about the number of backups or size of the backups in the Save To location.
- In the When the number of backups in this location exceeds box, enter a number between 0 - 99.
- In the When the size of the backups in this location exceeds box, enter a number between 0.00- 999.99 and select either MB (megabyte) or GB (gigabyte).
- Setting either of the above values to 0 disables that specific warning.
- To view the contents of the Save To backup location, click Open Backup Location.
- If you want to close this screen when the backup is completed, select the Close this screen after the backup is completed check box.
- Click Backup.
Back Up and Copy to a Local File Location
- Follow the Back Up your Database using the Red Wing Cloud Services section in this document.
- Close CenterPoint.
- Connect to the Red Wing Cloud Services.
- Select File Explorer.
- Click Connect.
- Verify that the L:, P:, and S: drive letters are displayed in the File Explorer.
- Copy the .cpz backup file you want from the L: drive to your local drive location.
Restore From a Local Drive
- Connect to the Red Wing Cloud Services.
- Select File Explorer. Click Connect.
- Verify that the L:, P:, and S: drive letters are displayed in the File Explorer.
- Copy the .cpz backup file you want to restore to the L: drive.
- Close the File Explorer application and perform the restore from Centerpoint as normal.
|
Document: 3288 |
|---|