CenterPoint® Fund Accounting
- Refund a Negative Invoice (Credit Memo)
Related Help
 View or Print as PDF
If a refund is needed for a customers return that was saved as a negative invoice instead of a customer deposit, please choose one of the steps below.
This document provides step-by-step instructions on how to refund a negative invoice.
Step A - Create a Customer Refunds Sales Item (One Time Setup)
Step B- Enter a Negative Customer Invoice
Step C - Apply the Negative Invoice to the Original (Positive) Invoice
Option 2 - Refund with Handwritten or Computer Generated Check Refund
If a refund is needed for a negative invoice for a customer, you have two options:
Option 1 - Cash Refund
Step A: Create a Customer Refunds Sales Item (One Time Setup)
- Select Setup > Sales > Items. Click New.
- Enter an Abbreviation that can easily identify the Customer Refunds sales item.
- Enter Customer Refunds as the Name.
- Select Non-Tracked Item as the Type.
- Select a Sales Tax Category.
- Uncheck the Taxable box.
- On the Accounts tab, enter or select a Sales and a Returns & Allowances account. If you are also using the Sales Orders module, an Expense account is required.
- Click Save.
Step B: Enter a Customer Invoice (this will deduct the amount from the cash account and document the refund on the customers account)
- Complete the Select tab with the customer's information.
- Select the Invoice tab.
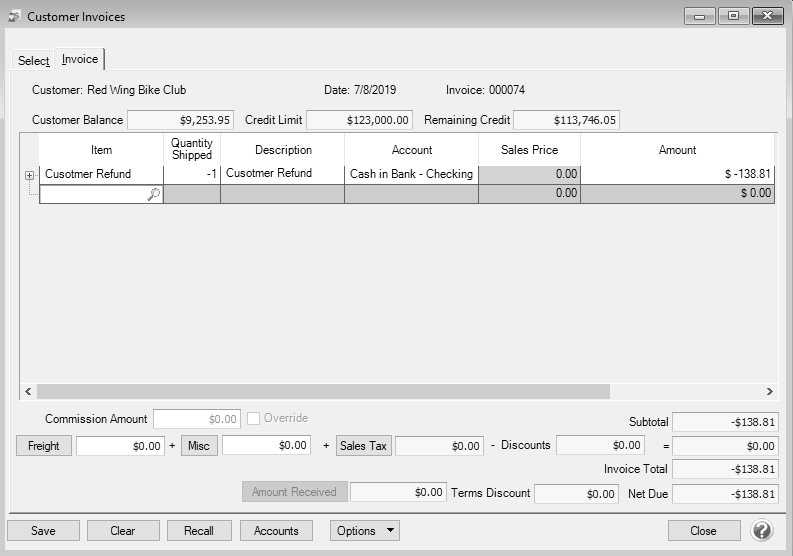
- Select the Customer Refund sales item created in Step 1-A.
- Enter a negative Quantity.
- Change the Account to the Cash account used for refunding money to customers.
- Enter the amount to be refunded in the Amount column as a negative number.
- Save the invoice.
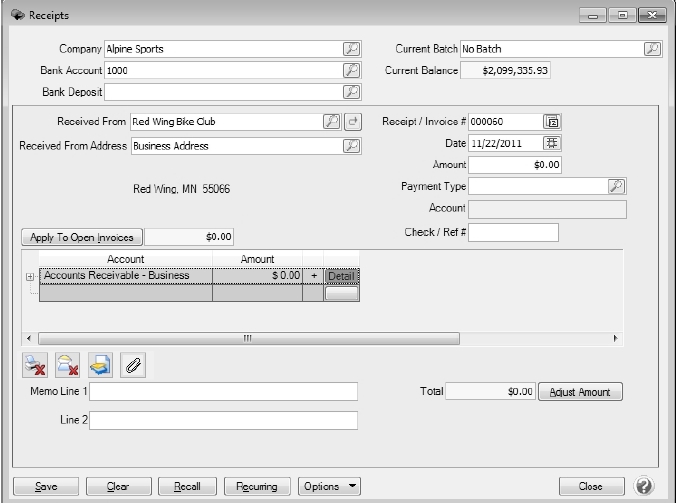
Step C: Apply the Negative Invoice to the Original (Positive) Invoice
This has no financial affect, but will remove both the customers negative and positive invoice from the A/R Aging Report.
- Select Processes > Sales > Receipts.
- Fill in the Company/Fund, BankAccount and Customer fields.
- Click on the Apply to Open Invoices button.
- Select both the positive and negative invoices for the refund amount.
- Click OK.
- The total of the receipt will be $0.00.
- Click Save.
Option 2 - Refund with Handwritten or Computer Generated Check Refund:
- Complete all of the steps above for a Cash Refund (Note: in the Account field, be sure to select the checking account you will be writing the check out of).
- Select Setup > Names. Find this customer and click Edit. Put a check mark in the Vendor box. Click Save.
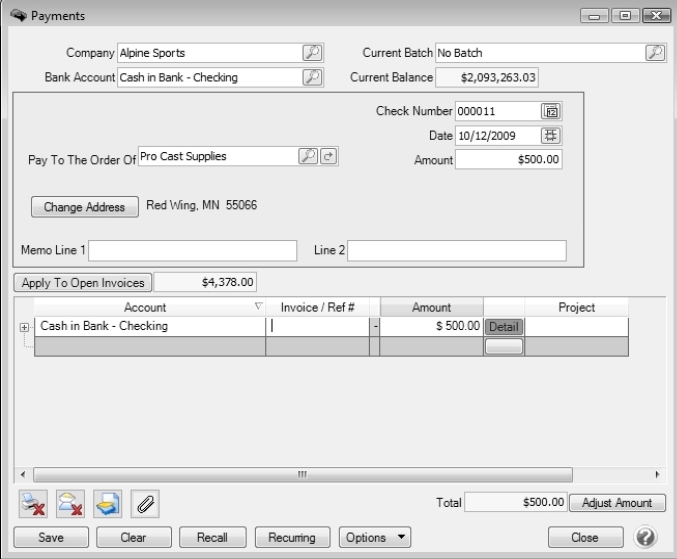
- Select Processes > Payments.
- Process a normal Payment transaction for this customer. Important: when entering the payment transaction, use the checking account in the Bank Account AND in the Account fields. If a computer generated check is needed, be sure to select the Print this Check field, otherwise leave it blank to record a handwritten check.
- Click Save to complete the refund and if selected, print the check.
Document: 3250