CenterPoint® Fund Accounting
- Enter a Customer Return
Related Help
_24.jpg) Customer Returns Video - Duration: 7 min 08 sec
Customer Returns Video - Duration: 7 min 08 sec
 View or Print as PDF
 This document provides step-by-step instructions on how to enter a transaction that will create a customer deposit that can be refunded or applied later. It also provides instructions on how to provide a refund to a customer who has returned an item.
Step A - Set the Customer Returns and Refunds Preference
- Select File > Preferences > Customer Invoices > Customer Returns and Refunds.
- In the Customer Credit Invoices box, select Always Show me the Save options.
- Click Save.
Step B - Enter a Return for a Customer
- To begin entering a return select Processes > Sales > Customer Invoices from the main CenterPoint screen.
- Enter the Customer by typing in a portion of the customer’s name or abbreviation.
- Once the customer is selected, the Shipping Method, Salesperson, Terms, Due & Discount Date and Sales Tax fields will be populated automatically.
- Complete all other needed fields on the Select tab. Most fields are optional – complete those that are pertinent to your business.
-
-
- The selection made on the Printing tab in Setup > Names > Names
- The system will automatically bring you to the Invoice tab when you enter/tab off of the last field on the Select tab. Otherwise click on Invoice tab manually.
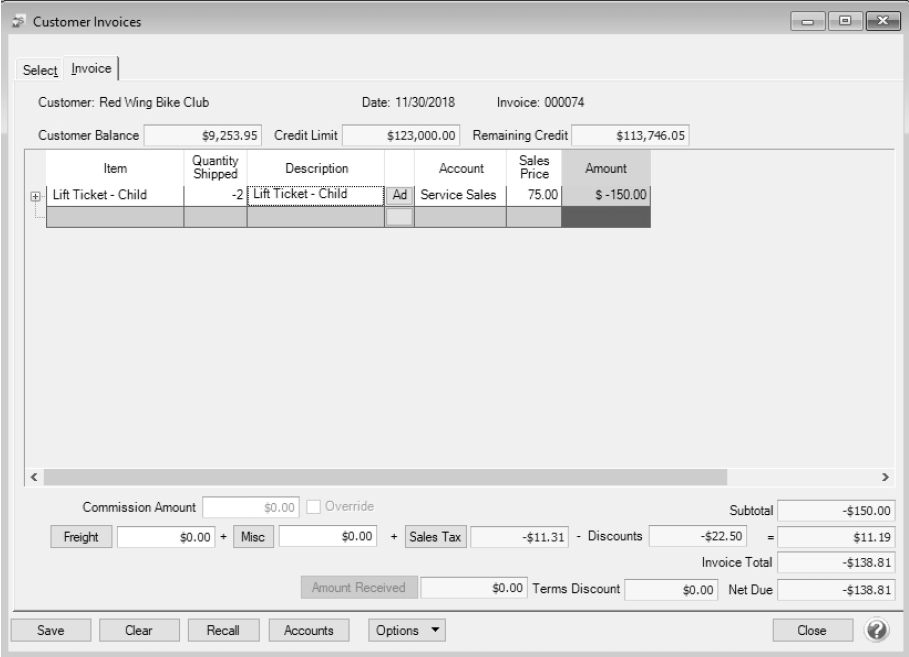
- In the grid on the Invoice tab, enter the first Item/service that was returned by the customer.
- Once the Item is selected, the system will automatically display the Description, Account and Sales Price. This information will pull from the information that has been setup on the item.
- The Quantity should be entered as a negative if the product was returned. The Description, Account and Sales Price, and Taxable check box can also be modified, if needed.
- Continue entering additional lines on the Invoice tab for each item that was returned.
- If applicable, enter Freight and Miscellaneous charges at the bottom of the screen. To specify management details to be posted for the freight or miscellaneous charges, for example profit center, location, project, etc. or a notation specific to these charges, click the Freight or Miscellaneous buttons and enter the information on the Details screen.
- The Sales Tax will be calculated automatically.
- Click Save.
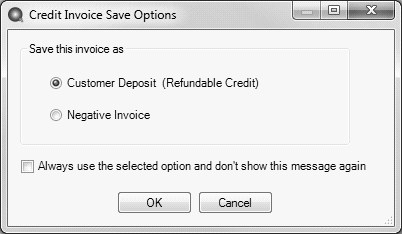
- The Credit Invoice Save Options box will be displayed. If you would like to refund the customer for the return, select the Customer Deposit (Refundable Credit) option. Otherwise select the Negative Invoice option and CenterPoint will create a negative invoice (credit) that can be applied to other unpaid invoices.
- Click OK.
Step C - Refund a Customer Deposit(Optional)
If Customer Deposit (Refundable Credit) was selected as the Save Option in step 14 above, use one of the two options below to print a check for the refunded deposit.
Option A: Refund a Customer Deposit with a Printed Check
- Select Processes > Sales > Refund Customer Deposits.
- Enter the Company/Fund, Customer, and select the Refund Date. In the Refund Method box, select Payment.
- Select the BankAccount. If you need to print a check for the refund, enter the check number and check the Print this check? box.
-
Memo Line 1 will display the following text: "Refund customer deposit/overpayment". This text can be changed. Enter any other information into the Memo Line 2 box.
- Select the deposit to be refunded.
- Click the Print button. (An image of a printer displays on the button. A green check mark means the check will be printed and a red X means the check will not be printed.) Select whether the check should be printed when it is created, the printer to print the check to and the number of copies to print. To set your default for the Print button, right-click on the button and select Set As Default. To override the Print button default, click the Print button and change the settings on the Print Settings screen.
- Click Save to complete the refund .
- Click Close.
Option B: Create a Vendor Invoice for a Refunded Customer Deposit
This option can be used to create a vendor invoice which can then be paid at a later time from the Pay Invoices Due or Payments screen.
- Select Processes > Sales > Refund Customer Deposits.
- Enter the Company/Fund, Customer, and Refund Date.
- Select Accounts Payable Invoice as the Refund Method.
- Select the AP Account and enter an optional InvoiceNumber.
- Select the Customer Deposit you are refunding.
- Click Save to complete the refund and create the AP Invoice. Click Close.
|
Document: 3036 |
|---|