***See jobboss-form-designer.html instead.
CenterPoint Payroll
- JobBOSS Check Designer for Stub/Stub/Check
Related Help

The Check Designer is an additional optional module sold separately and distributed with CenterPoint Payroll.
Create your company’s own checks with the Check Form Designer (Setup > Forms Designer > Check Form Designer). This design tool allows you to start with a simple design template, and add fields of data to the check in the location of your choice. Virtually any field of data can be included on the check. Preview the check as you design it with the click of a button. Once completed, the check can be saved for later use. Create and save as many check variations as you like.
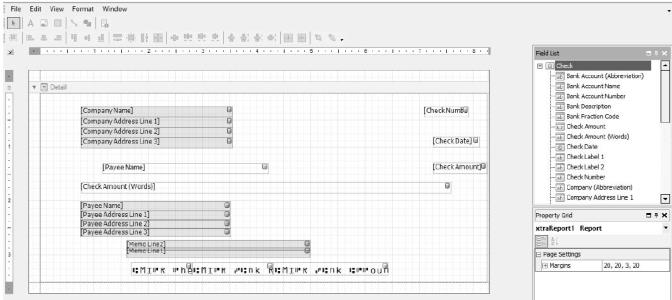
The check form designer has one Detail section. The Detail section represents the check face and will be repeated for each check when it prints.
Included in this topic is instructions on how to:
Save a Customized Form as Stub/Stub/Check
System-Supplied Check Forms
Red Wing Software supplies you with a list of available check forms that have been saved. System-supplied check forms appear in blue and cannot be overwritten, however they can be edited and then saved as a different name. Select File > Open or click the Open icon to display the list of available check forms (when the Check Form Designer is open, there will be two File menus, select the lower File menu).
Open an Existing Form to Edit
We recommend you start creating your custom form by opening an existing form that can be modified and then saved with a different name.
- Select Setup > Forms Designer > Check Form Designer.
- Select File > Open.
- Choose the existing form, for example, Check/Stub/Stub (Alternate) and click Open. In the example below, Check/Stub/Stub (Alternate) was selected.
Check Settings
To set the check placement, selectFile > Form Settings.
There are five settings:
- Check/Stub/Stub where the check is printed at the top of the form followed by two stubs.
- Stub/Check/Stub where the check is printed in the center of the form between two stubs.
- Check/Detail where the check is printed at the top of the form with a single large detail stub.
- Stub/Stub/Check where two stubs are printed at the top of the form followed by a check.
- Stub/Check/Address When a new check form is saved with this setting, the Bottom "Stub" portion of the Form will be replaced with a pre-formatted Payee and Return Address.

- Select Stub/Stub/Check.
- Click OK.
Fields List
Data fields that can be used to design your check display on the upper-right side of the Check Form Designer screen. The following fields are the available data that be printed on the check:
| Company (Abbreviation) | Check Date |
| Company Name | Check Number |
| Company Address Line 1 -3 | Check Amount |
| Company Phone | Check Amount (Words) |
| Company Contact | Memo Line 1 & 2 |
| Company Logo | Signature 1 & 2* |
| Payee (Abbreviation) | MICR Check Number |
| Payee Name | Bank Description** |
| Payee Address 1 - 3 | MICR Bank Routing Number** |
| Payee Contact | MICR Bank Account Number** |
| Bank Account (Abbreviation) | Bank Fraction Code** |
| Bank Account Name | Check Label 1-2 |
| Bank Account Number |
*Signature images are pulled from the company and account the check is being written from; signatures are created in Setup > Signatures and are assigned to a company/account in Setup > Accounts > Accounts. If the user printing the checks does not have the necessary privileges to use the signatures they will not print.
**Bank information is pulled from the checking account used to write the check. Bank accounts are setup in Setup > Accounts > Accounts.
To include a field in your check form design, select the field on the upper-right side of the Check Form Designer screen and continue to hold your left mouse button while you drag the field to the Detail section of the check. Properties for a selected field display on the lower-right side of the Check Forms Designer screen. In this example, the properties that are displayed are for the selected Check field.
Add a Field
- The Fields box will list all of the fields that can be added to this form. Find the field you wish to add in the Fields list. For example, Company Logo.
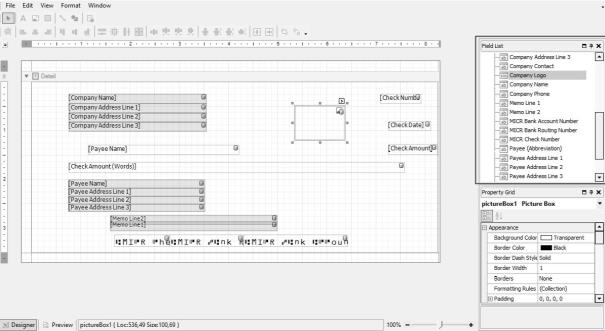
- Then simply drag and drop the field to the desired location on the form.
- Press, and hold down, the left button on the mouse, to "grab" the object.
- While continuing to hold down the left button the mouse, "drag" (move) the object to the desired location,
- "Drop" the object by releasing the left button on the mouse.
- When the field is selected on the form it will be displayed in a shaded box as you see above. The squares at each corner and center points can be used to resize the field. Click on one of the boxes and drag it to change the size of the field.
Resize a Field
- Single click on a field on the form. When the field is selected, it will be displayed with small squares around the rectangle around the selected field. as you see below.
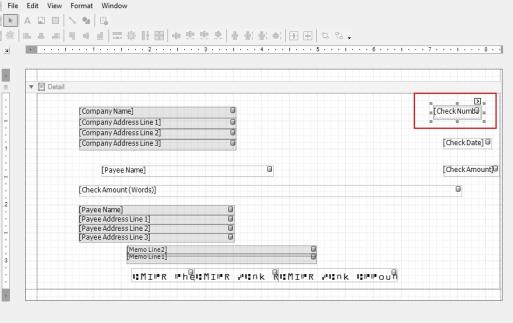
- Click on one of the boxes and drag it to change the size of the field. The same process can be used to resize lines, pictures, text fields, etc.
Remove a Field
- Click on the field you wish to remove from the form.
- Press the Delete key on your keyboard.
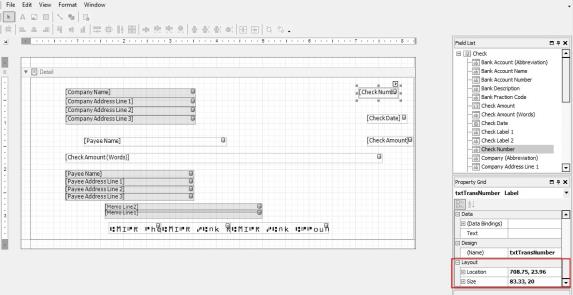
Move a Field
- Click on the field you wish to move.
- Drag and drop the field to the desired location.
- You can fine tune the location and size by adjusting the Layout settings on the right.
Change the Font
- Click on the field you wish to change to select it.
- To the right, the font and size are displayed in the Appearance section. Click in the font field to display the lookup button, click
 .
.
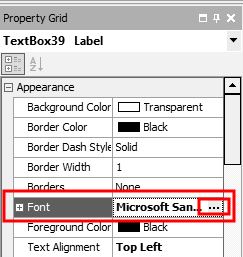
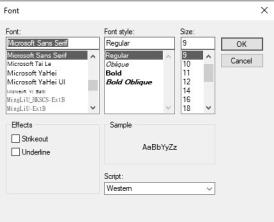
- The Font screen will display. Select your desired Font, Style, and Size. Click OK.
Add a Text Field (Label)
Additional labels that are not stored in the database, but will print on the check can be entered onto the form.
- Click on the
 button in the toolbar. Your cursor will change to a + .
 - Click in the form to specify where you want the text located and drag to the size needed.
- With the field selected, change the text in the Data section to the right.

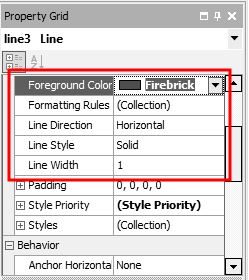
Add a Line
- Click on the
 button in the toolbar.
 - Click in the form where the line should be located and drag to draw a line.
- Drag-and-drop to move the line to your desired location.
- To the right, the Foreground Color, Line Direction, Line Style, and Line Width of the line are displayed in the Appearance section. Click in any field and click the drop-down arrow to change the selection.
Import a Logo
Prior to adding your logo to the form itself, you must import the logo into the company information.
- Select Setup > Companies. Edit your company.
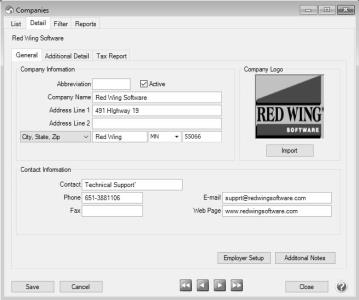
- Click on the Import button. Browse to the image file for you logo. Click Open.
- Click Save.
- The logo is then added to the form using the form designer. Follow the Add a Field instructions to add the Company Logo field to the form.
Formatting Checks
- To align a field to the left, select the field and select Format > Justify > Left . A field can also be aligned to the center, right, or justified by selecting Format > Justify > Center, Rights, or Justify .
- To align multiple fields horizontally to the left, select all of the fields by holding the CTRL key down while making the selections, and then clicking the Lefts icon
 . Fields can also be aligned horizontally to the center or right by selecting the fields and clicking the Centers or Rights icon
- To align multiple fields vertically to the top, select all of the fields by holding the CTRL key down while making the selections, and then clicking the Tops icon
 . Fields can also be aligned vertically to the center or bottom by selecting the fields and clicking the Middles or Bottoms icon
  .
. - To make multiple fields the same width, select the fields and click the tWidths icon
 . Fields can also be made the same height or size by clicking the Height or Both icons
  .
.
Save a Customized Form as Stub/Stub/Check
- Once your desired changes have been made, select File > Save As... within the Form Designer.
- In the Name box, enter Stub/Stub/Check.
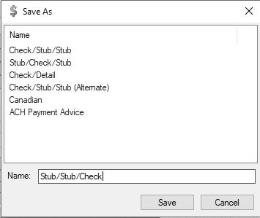
- Click Save.
Set the Stub/Stub/Check Preference to Print Checks
To begin using the Stub/Stub/Check check, specify it in your preferences.
-
Select File > Preferences > Payroll > Printing - Checks.
- Select the Database tab and in the Select CheckType field, select Stub/Stub/Check.
- Verify the other settings, for example the printer you want to print the checks to or if you your check stock has the pre-printed Company Name, Address, etc. on the stock you would probably set Print Company Name and Address to No.
- Click Save.
Use a Customized Form in Another Database
- Open the Forms Designer in the database with the custom form.
- Select File > Open and select the customized form.
- Select File > SaveFileAs...
Note: You must select Save File As... option, not the Save As option.
- Browse to a location to save the file, such as your Desktop. Note where you are saving the file to, as you'll need to find the file later. Click Save.
- Open the Forms Designer in the database you wish to add the custom form to. Select File > OpenFile.
- Browse to the location used in Step 2 and select the custom form file. Click Open.
- Select File > SaveAs... to save the custom form in the new database.
|
Document: 3325 |
|---|