CenterPoint® Payroll
- Using Recurring Transactions
Related Help
 View or Print as PDF for CenterPoint Accounting for Agriculture
 View or Print as PDF for CenterPoint Accounting
 View or Print as PDF for CenterPoint Fund Accounting
Every business has routine recurring transactions such as monthly utility bills, insurance payments and annual rent payments are some examples of routine recurring transactions. Setting up these as recurring transactions eliminates the job of reentering the same or similar details each time you enter an invoice or pay the vendor. The dollar amount of the transaction does not need to be the same each month in order to use recurring transactions. CenterPoint offers two processes that can be used for recurring transactions. We recommend you read through Step B of each option to decide which process would work best for your business. Once you've decided follow both steps A & B for the selected option.
Option A - Process an Individual Recurring Transaction
Step A - One-time setup for each recurring transaction (Make a transaction recurring.)
Option B - Process Groups of Recurring Transactions at Once
Step B - Print Checks or Create A/P Invoices for Transactions in the Recurring Batch
Option A: Process an Individual Recurring Transaction
This option has you create a new transaction manually each time, but the details of that transaction can automatically be retrieved instead of entering the details manually.
Step A - One-time setup for each recurring transaction (Make a transaction recurring.)
- Select Processes > Purchases > Payments or Processes > Purchases > Vendor Invoices (A/P).
- Enter the transaction as you normally would. (Refer to the Enter a Vendor Invoice, or Enter a Payment topics for step-by-step instructions on entering purchase transactions).
- Once all details lines have been entered to the appropriate accounts, select the Recurring button at the bottom of the screen.
- Enter a Description for this recurring transaction.
- In the grid, the Account Name(s) used in the original transaction will be identified.
- The Calculation Type can be either Fixed Amount (if you'd like to charge the same amount to the account each time the transaction is created) or Percent. Percent is used if the amount changes each month. When the recurring transaction is subsequently used, the total amount of the invoice will be entered and the system will distribute it to the accounts based on the percentages setup on the recurring transaction.
- Enter the appropriate Value for each line. The value will either be an amount or percent, depending on what was selected in the Calculation Type field.
- Set As Default for " " should be selected if you'd like this recurring transaction assigned to this vendor. The transaction will then be available in the vendors list of recurring transactions. Normally you would want to select this option.
- Set " " to automatically load default recurring transactions should be selected if this is the only transaction that you enter for this vendor. When this option is selected, each time this vendor is selected in the transaction screen, the recurring transaction details will automatically be displayed. If you have multiple transactions that you enter for this vendor each month, then do not select this option. You will then need to manually select the transaction each time it's used.
- Click Save.
- Verify all information in the transaction and click Save.
- Repeat Step A for each recurring invoice.
Step B - Create a Transaction from a Recurring Transaction
- Once a transaction is marked as recurring, transaction entry becomes very efficient. When you would like to use the recurring transaction, simply select Processes > Purchases > Payments or Processes > Purchases > Vendor Invoices (A/P) to begin the transaction.
- Specify the vendor in Pay To The Order Of (Payments screen) or Vendor (Vendor Invoices (A/P)) field.
- If Set " " to automatically load default recurring transactions was selected when the original transaction was marked as recurring above, then the entire transaction will automatically display for you. Skip directly to step 3.
- If Set " " to automatically load default recurring transactions was not selected when the transaction was originally marked as recurring above, then you'll need to manually select the appropriate recurring transaction each time you'd like to use it. This is done by clicking on the Recurring Transaction icon
to the right of the vendor. The Recurring Transaction icon will display with a yellow background if a name has an applicable recurring transaction. Select the appropriate recurring transaction and click Select.
- Make any needed changes to the displayed entry and Save the transaction.
Option B - Process Groups of Recurring Transactions
If you have multiple transactions (for various vendors) that you use every month (or every quarter or year), you can assign these individual transactions to a batch so that the entire group of transactions can easily be created when needed.
Step A - One-time Setup for each Recurring Transaction (Create the transaction and assign to a batch.)
- Select Processes > Purchases > Payments or Processes > Purchases > Vendor Invoices (A/P).
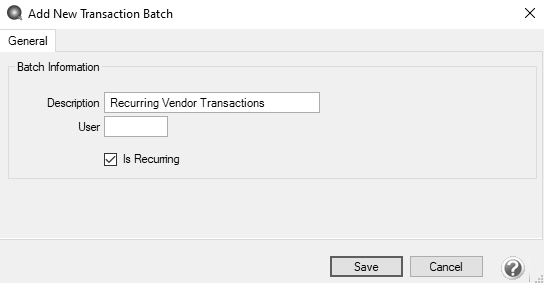
- Right click in the Current Batch field and select New.
Note: This step needs to be completed only on the first recurring transaction that is entered.
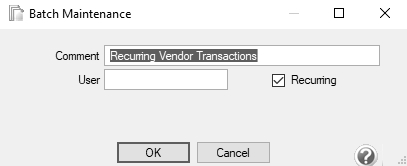
- Specify a Description for this batch/group of recurring transactions.
- If CenterPoint is used by multiple users, but only one user will be using this batch, then specify that User.
- Select the Is Recurring box.
- Click Save.
- In the Current Batch field, select the Recurring Vendor Transactions batch created in step 2.
Note: If the batch is not displayed in the list, you may have your Current Batch field setup to not display recurring batches. To correct that, right click in the Current Batch field and select Display Recurring Batches.
- Continue entering the transaction as you normally would. (Refer to the Enter a Vendor Invoice, Enter a Cash Purchase or Enter a Handwritten Check topics for step-by-step instructions on entering purchase transactions).
- If this is a Payment transaction and you would like the system to print a check when the transactions are processed each month, select the Printer icon.
- After all information is entered, click Save. Because a batch was selected in the Current Batch field, this transaction has not yet printed a check or affected the vendor's balance. Instead it has been placed in a batch that can be processed.
- Complete steps 3-6 for each transaction that you'd like added to this group of recurring transactions (batch).
Step B - Print Checks or Create A/P Invoices for Transactions in the Recurring Batch
- Once all recurring transactions have been added to a recurring batch (Step A), then they are available to use over and over again.
- At the beginning of the month (or whenever you'd like to process these transactions), select Processes > Batch Transactions.
- All existing batches will be displayed. If changes are needed to any transactions prior to psoting (for example if an amount has changed), select the batch assigned to the transactions in step A, then click on the Transaction Activity tab. If no changes are needed on these transactions, skip directly to step 5.
- Select the appropriate transaction and click Edit. Make any needed changes and click Save.
- Select the Open Batches tab. Select the batch assigned to the transactions in Step A and click Post.
- Click OK.
- The system will automatically create the appropriate transactions for you.
- If the transactions in this batch were Payments that were created with the Printer icon selected, then the system will prompt you to start a check run.
- If the transactions in this batch were Payments that did not have the Printer icon selected, then the system will record the payment transactions without printing checks.
- If the transactions in this batch were Vendor Invoices (A/P), the system will create unpaid invoices for each transaction in the batch.
- After posting, the batch will stay in Batch Processing because it was marked as a Recurring Batch. Each time you need the system to print these checks or create these vendor invoices, simply repeat Step B.
Document: 3087

