CenterPoint® Payroll
- Create and Assign a Signature to an Account/Company and Check
Related Help

Signatures are used in conjunction with the Check Forms Designer and allow you to assign a signature image with a name for a specific company/account. You can assign up to two signatures to a bank account/company in Setup > Accounts > Accounts. Signatures can be printed on check forms by adding the Signature 1 or Signature 2 field to the check form using the Check Form Designer.
To use a signature on a check, you must have the appropriate security level to access specific signatures on a per company basis (this right will allow you to include a signature on a check, but will not allow you to modify the signature). The security level is usually assigned by your System Administrator using a Security Policy on a per company basis. If you are granted access to signatures for a company, you will have access to all signatures for that company. If you do not have access to signatures, you will not be able to use Signature lookups and if you print checks that have been assigned signatures, the check will print but the signature will not print.
This topic contains the following information:
Setup Security Policies for Signatures
Create a Signature:
- Select Setup > Signatures.
- Click New.
- In the Abbreviation box, enter up to ten characters of optional information that you can easily identify the signature by.
- In the Name box, enter up to 30 characters of required information that describes the signature.
- In the Company box, click
 and select a company to assign the signature to or type a company to assign the signature to.
 - Click Import and select an image of the signature that has been previously scanned and saved as a BMP, GIF, ICO, JPG, PNG, WMF, TIF, TIFF, EMF or EXIF file type.
- Click Save.
- Repeat steps 1-7 for each signature that will be used on payroll or accounting checks.
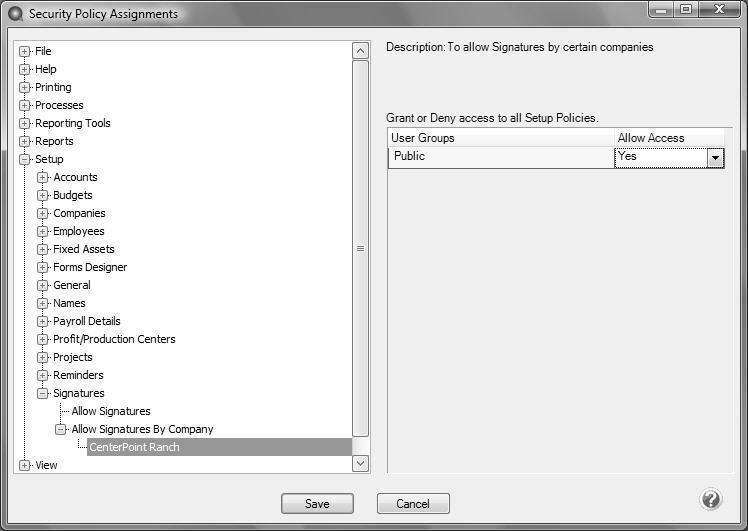
Setup Security Policies for Signatures
Note: Database Security must already be setup. See the document Users & Security for more information on setting up database security. Signatures will not be included on checks printed by a user who does not have access to the company’s signatures.
- Select File > Security > Security Policies.
- Expand Setup > Signatures > Allow Signatures by Company. Highlight the company you are setting security for.
- To the right, select whether or not to allow access for each user group.
Setup Company Bank Information
- Select Setup > Accounts > Accounts.
- Select the bank account that you want to assign signatures to.
- Click Edit
- Click the Detail tab.
- Under Company Name, select the company the signature should be assigned to.
- In the Signature 1 and/or Signature 2 box, click and select the name of the signature image that should print on the check when checks are printed for this company and bank account.
- Click Save.
Assign a Signature to a Check
- Select Setup > Forms Designer > Check Form Designer..
- Select File > Settings, select the check you want to add a signature to, and then click OK.
- In the upper-right side of the Check Form Designer, select Signature 1 and/or Signature 2 and drag the field to the place where you want the signature(s) to print on the check form.
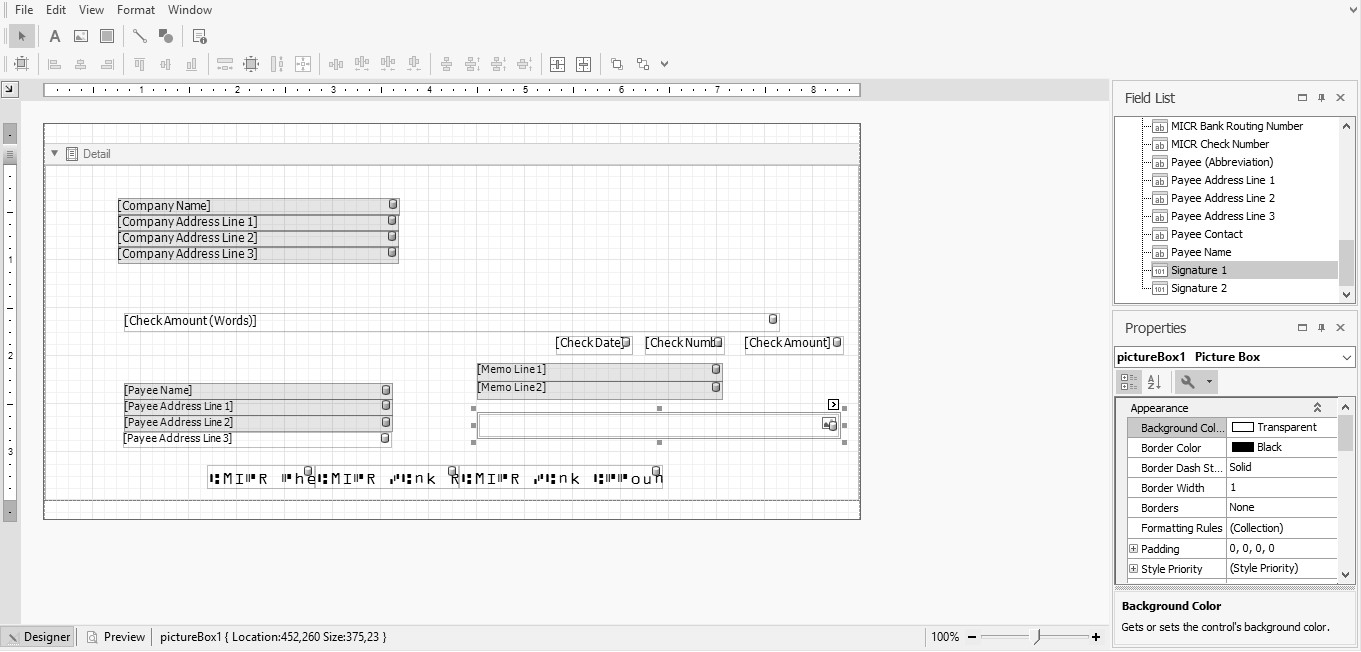
- Change any of the signature properties by using selections on the lower-right side of the Check Form Designer. For detailed information about using the Check Form Designer, see the Forms Designer topic.
- Select File > Save.
|
Document: 3381 |
|---|